

 Part 3 of our 2017 Guest Blog Series – This post is written by Brad Booth – Golf Course Architect.
As a golf architect, the most common question I am asked is, “how in the world do you start”, (the design process). The thought of looking at a very large parcel of land and then developing it into a new golf experience is indeed a daunting challenge. My hope with this short piece is to share my starting process with you, or as we call it in the trade the “preliminary design & consultation phase”. This is the beginning of exploring and uncovering a golfing environment that can both create challenge and produce enjoyment. Although my discussion in this blog is primarily centered on a new golf facility, there are many common elements that relate to the renovation or restoration process as well.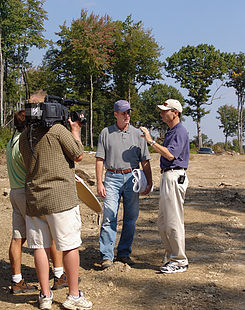
The first thing to understand is that golf architecture is an art form blended with technical practices wrapped around a recreational endeavor. That’s quite a soup of often opposing ideas. To begin, I break the process into steps that create the foundation of the design. Summarized below are these preliminary steps:
-
Owner’s Goals and Desires: I have preliminary discussions with the owner(s) and/or stakeholders about the feasibility of a golf course on the site and learn what type of course they would hope to develop. There are many factors to consider here and at this point it is my job to provide insight based on my experience and expertise and to be as honest as possible about the prospects. If after these initial discussions, the owners want to explore further, we proceed to the next step.
-
Information Gathering: Next, I gather base information essential for further studies and plans. I create a digital document of existing site conditions. This requires me to get input from other professionals such as surveyors, engineers and photogrammatists. From this collective information I create a base map that includes but is not limited to: property boundaries; property shape; orientation; soils; elevation intervals (topography); vegetation cover; entitlement areas (wetlands, archeological, waterways, habitat, manmade conditions, etc.); prevailing winds; rising and setting sun angles…and other details as necessary.
-
Site Walks: With this mass of base information in hand I then put “foot to ground” and make multiple site walks to understand the site and discover what interesting aspects it offers. During this step, I am mentally “creating” and “envisioning” what “could be”. It is essential to be able to visualize the site on a very large scale. This is often the most fun and exciting part of the process as I start to “see” the ground on the plan and relate it to what I find on the site walks.
-
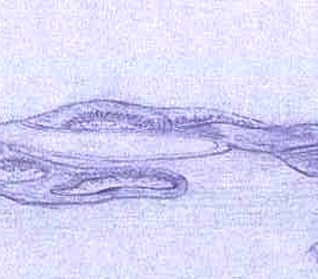
Pen to Paper (or rather mouse to screen): Having accumulated all this technical data and physically relating it to what I found during my site walks, I begin to create a centerline route plan. A centerline route plan is the collective routing of the golf holes drawn on the base map in the form of the centerlines of all the holes. A centerline is the line starting at the tee point continuing to the landing point of the first golf shot then to subsequent landing points, if required, and finishing at the green point. For three par holes the centerline starts at the tee point and ends at the green point. Important during this process is the consideration of the natural and potential made features that I find interesting and where they could fall
 relative to the centerline of a golf hole. Features that fit the site, integrate with the natural elements and impact the physical and emotional experience are a part of the centerline route exercise. Also important are the consideration of the standards of accepted safety that impact the spatial arrangement of the centerlines. Potential grading and blending with the existing landforms, the ebb and flow of the hole arrangements, shot values, sun angles, prevailing winds, entitlement conditions and aesthetics add to my thoughts as I move through this phase of work. Typically, several centerline route plans are studied to find what might create the best golf experience for the site.
-
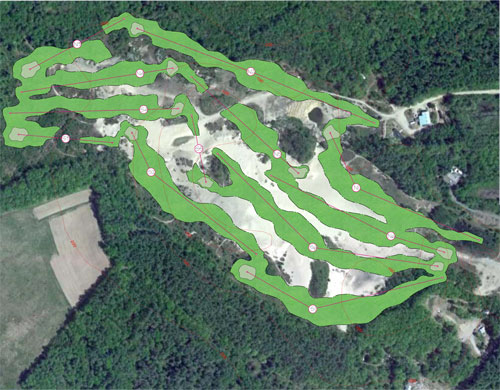
Fleshing it Out: Once I have selected the best centerline route plan for the site, I then “flesh out” the golf features such as the vegetation (e.g. tree) areas and lines, tee arrangements, fairway setup, sand bunkers, made landforms, water features, green locations, shapes and related non-golf elements, (clubhouse, paths, maintenance, etc.). At this point I have created what is known as the “pretty picture”. It is what most think of when they see a golf plan expressed as a graphic representation. It is also the culmination of the work and art that came before. In the trade we call this the “preliminary design” and it is what forms the basis for the all the design work going forward.
So…this is how I start!
Although, based on individual site situations, there may be many other elements and considerations that enter into this starting process, arriving at this point is generally how a golf design project gets its legs. This may appear like the bulk of the full design process but in truth it only accounts for about 15% to 20% of the actual design work…but what happens beyond this is a whole other conversation…
See all of Brad’s work at www.BoothGolf.com
